How Do You Measure a Bathtub in 10 Easy Steps
To measure your bathtub in 10 easy steps, you’ll want to gather a flexible tape measure, pencil, and paper first.
Measuring your bathtub accurately is key to ensuring a perfect fit, whether you’re replacing or installing a new one. Start by measuring the inside length from rim to rim, then check the width at the tub’s widest point.
Next, measure the internal height from the basin bottom to the rim, and note both the basin length and width. Don’t forget to measure the tub’s external dimensions too.
It’s important to observe any curves or irregularities as well.
Make sure to verify your measurements at multiple points. This helps catch any inconsistencies and ensures accuracy.
Finally, double-check everything before you move on. Keep going to uncover detailed tips for a perfect fit!
Key Takeaways
- Use a flexible tape measure to measure from outermost edges for external size and inside the basin for interior dimensions accurately.
- Measure internal length and width across the longest and widest points inside the tub, keeping the tape straight and level.
- Record internal height from basin bottom to rim top and measure water depth up to the overflow drain for soaking depth.
- Measure external length, width, and height from finished floor to highest exterior point to ensure proper fit and installation.
- Double-check all measurements at multiple points, note curves or irregularities, and document with notes or photos for precision.
Gather Your Measuring Tools

Before you begin measuring your bathtub, gather the right tools to guarantee accuracy. Start with a flexible tape measure, as it adapts easily to the bathtub’s curves and edges.
Begin measuring your bathtub with a flexible tape measure for precise adaptation to curves and edges.
You’ll also want a pencil and paper nearby to jot down your measurements as you go. Accurate measurements depend on holding the tape measure straight and taut, so avoid any slack that could throw off your numbers.
Make sure your measuring tools are reliable to capture both the exterior and interior dimensions. Remember to measure from the outermost edges for the bathtub’s full size and inside the basin for interior dimensions.
Double-check each measurement in multiple spots to confirm consistency before moving forward with installation or replacement. This careful preparation ensures you won’t face surprises later.
Measure the Tub Length Inside the Rim

Start by measuring the tub length from rim to rim, making sure your tape measure stays straight and level. Focus on the widest part inside the rim to get an accurate interior length.
Use a flexible measuring tape to easily navigate curves and record the measurement in inches. It’ll make the process a lot easier and your measurement more precise.
Rim-To-Rim Measurement
When measuring the bathtub length inside the rim, you’ll want to stretch your tape measure from one inner edge directly across to the opposite inner edge along the longest side. This rim-to-rim measurement is vital for determining the exact bathtub size, especially if you’re fitting an alcove tub or replacing an old one.
To get an accurate measurement, use a straight, level tape measure to avoid curves. Measure in inches, rounding to the nearest quarter inch.
Also, check multiple points to account for any warping. It’s a good idea to compare your measurement with manufacturer specs to make sure everything lines up.
Interior Length Accuracy
Although measuring the bathtub’s interior length might seem straightforward, you need to guarantee your tape measure is straight and level as you stretch it from one inner wall to the opposite inner wall along the bottom of the basin. This ensures measurement accuracy, which is essential when recording bathtub dimensions.
Focus on the widest point inside the tub, usually from the back wall to the front edge. If the interior shape tapers or curves, take multiple measurements to find the maximum interior length.
Don’t forget to double-check your numbers before noting them down. Accurate interior length measurement helps you avoid installation issues and ensures the replacement tub fits perfectly, maintaining both function and style in your bathroom.
Measuring Tools Needed
To get an accurate interior length measurement of your bathtub, you’ll need the right tools. Whether you’re measuring an alcove bathtub or another style, precise tools ensure you capture the true width and height inside the rim.
Here’s what you’ll need:
- Flexible measuring tape for easy maneuvering along curves
- A level to keep the tape straight and avoid angled readings
- Notepad or device to record measurements accurately
- A helper to hold the tape taut, ensuring no sagging
Use the flexible tape to measure from one inner rim to the opposite rim at the longest point. This is usually from the drain end to the front edge.
Take multiple readings and use the smallest consistent value for accuracy. This method guarantees your measurements reflect the true interior length.
Record the Tub Width at the Widest Point
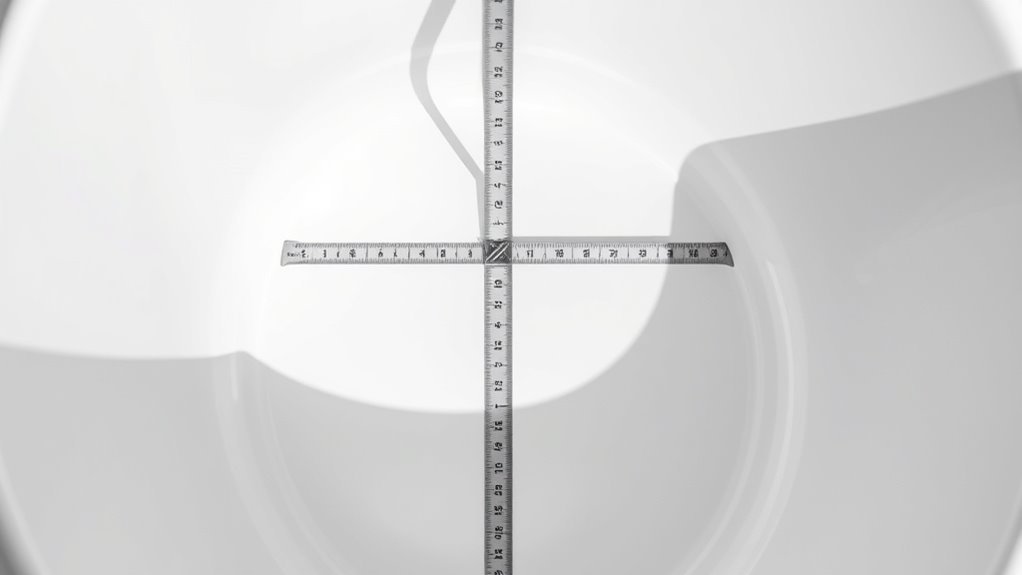
First, find the widest section of your bathtub, whether it’s the rim or the interior basin. Use a tape measure to get an accurate width across the top edge, making sure to include any flange or rim.
Take your time to keep the tape level and record the measurement carefully. It’s all about getting a precise number here, so don’t rush it!
Identify Widest Section
Where should you measure to get the most accurate width of your bathtub? You need to locate the widest section, which is usually the rim or top edge. This is where you’ll get the true bathtub width.
To guarantee precise measurements, follow these steps: Use a measuring tape to span the distance between the two furthest points across the widest section. Keep the tape straight and level to avoid errors.
Measure at different spots along the same section to confirm the widest point. Record your measurement in inches or centimeters, whichever you prefer. Easy, right? Just take your time and double-check to be sure!
Use Accurate Measuring Tools
Although measuring a bathtub’s width might seem straightforward, using the right tools guarantees your results are accurate and reliable. Grab a flexible measuring tape to capture the tub’s dimensions precisely, especially at the widest point, usually across the top rim or interior shoulder.
Make sure the measuring tape is straight and taut—avoid sagging or slack that could throw off your accuracy. Measure from one outer edge to the opposite, noting the value in inches or centimeters.
Since tubs often have curves or irregular shapes, take several measurements along the width to confirm the widest section. Record your findings carefully, and consider noting or photographing the spot where you measured.
This attention to detail ensures you have dependable dimensions for installation or replacement. It might seem like extra work, but trust me, it’s worth it!
Note Flange and Rim
When you measure your bathtub, make sure to include the flange or rim since these often extend beyond the interior basin and affect the overall width. The flange or rim is usually the widest part, so capturing this measurement guarantees an accurate fit.
Use a tape measure to record the distance from one outer edge of the flange or rim to the opposite edge at the broadest section. To get a precise measurement:
- Measure across the widest point, usually the rim or flange
- Keep the tape measure straight and level
- Record the width from outer edge to outer edge
- Double-check to ensure the flange or rim is included
This flange and rim measurement is critical for fitting your tub and planning clearance. So, don’t skip this step—it really makes a difference!
Measure the Internal Height From Bottom to Rim
Since the internal height determines how much water your bathtub can hold and the depth you’ll soak in, you’ll want to measure it accurately from the bottom of the basin straight up to the rim’s top edge.
Use a tape measure, making sure it’s straight and level for an accurate bathtub measurement. Record the rim height where it curves or slopes, as designs vary.
Take several measurements along the length and width to check for consistency, especially if the rim isn’t even.
| Location | Measurement Point | Rim Height (inches) |
|---|---|---|
| Center | Bottom to rim edge | 18 |
| Left End | Bottom to rim edge | 18.5 |
| Right End | Bottom to rim edge | 18 |
| Front Edge | Bottom to rim edge | 17.8 |
| Back Edge | Bottom to rim edge | 18.2 |
This ensures an accurate internal height for your bathtub.
Determine the Basin Length and Width
After measuring the internal height, the next step is to determine the basin length and width. Focus on accurate interior measurements to capture the true bathtub dimensions.
Start by measuring the basin length along the centerline from one end of the basin to the other at the bottom. Then, measure the basin width at the widest point across the interior, usually near the top rim.
To guarantee precision, keep the tape measure straight and level. If the basin tapers or curves, measure at multiple points to get the full picture.
Make sure to record both the smallest and largest dimensions. Don’t forget to document these measurements carefully for installation and comfort.
These steps help you get accurate basin length and width, which are essential for fitting accessories and confirming the tub suits your needs.
Check the Soaking Depth to Overflow Drain
Next, measure the soaking depth by checking the water level up to the overflow drain. Use a tape measure to record the distance from the tub’s bottom to the overflow opening.
This helps you assess how comfortably deep the water will be when the tub is filled. It’s a simple step but really important to get right.
Measure Water Fill Level
How do you determine the true soaking depth of your bathtub? Start by filling your common alcove tub or Standard Bathtub with water until it just reaches the overflow drain. This ensures you measure the maximum water fill level accurately.
Use a measuring tape or ruler to gauge the height from the bottom of the basin to the overflow opening. Keep in mind, soaking depth reflects usable water capacity, not the tub’s exterior height.
To get precise results, follow these steps:
- Fill water to overflow drain level.
- Measure water height from basin bottom.
Wait a few seconds for the water to settle. Then, take measurements at various points around the basin.
This method helps you understand how your bathroom layout affects water capacity. It’s a simple way to know exactly how much water your tub can hold for a comfortable soak.
Consider Overflow Placement
Because the overflow drain sets the maximum water level, you need to contemplate its placement carefully when checking your tub’s soaking depth. Measure from the bottom of the basin straight up to the overflow drain to find the highest safe fill line.
This distance determines how much water your tub can hold before it spills, affecting both safety and comfort. Make sure the overflow height matches your tub’s manufacturer specifications to get an accurate soaking depth.
Knowing this measurement helps you use the tub’s water capacity efficiently without risking flooding. Proper overflow placement ensures you can enjoy a deep soak while avoiding water damage, so take the time to check and confirm its position during your measurement process.
Assess Soaking Comfort Depth
When you measure from the bottom of the tub basin up to the overflow drain opening, you’ll determine the soaking depth that affects your comfort. Use a tape measure to get an exact reading in inches, ensuring you know how deep the water can safely be filled.
Check the manufacturer’s specs to confirm the maximum water level the tub can hold without risk. Keep in mind, standard soaking depths range from 14 to 16 inches, but some tubs offer 22 inches or more for extra comfort.
To assess soaking comfort depth, focus on:
- Accurate measurement from basin bottom to overflow drain
- Manufacturer’s maximum water level specifications
- Typical soaking depth ranges for comparison
- Overflow height to prevent water spillage
This helps you choose a tub that suits your soaking preferences perfectly.
Measure the External Dimensions of the Tub
Before you start, make sure your tape measure lies flat along the top edge as you record the bathtub’s length from one outer edge to the other.
Next, measure the width by stretching the tape across the widest part of the tub, from one outer side to the opposite outer side.
To find the height, place the tape at the finished floor level and measure vertically to the highest point on the tub’s exterior surface. Take your measurements carefully, guaranteeing the tape stays straight and flat.
Once you’ve recorded the length, width, and height, double-check each measurement for accuracy. Accurate external dimensions help you choose the right bathtub and ensure smooth installation without surprises.
Keep these steps clear and precise for the best results.
Note Any Curves or Irregularities
After measuring the bathtub’s external dimensions, turn your attention to its shape. Carefully examine the tub for any curves, angles, or irregular contours along the sides, bottom, and rim. Use a flexible measuring tape to trace around these areas, noting the maximum and minimum measurements.
Pay special attention to concave or convex sections that might affect fitting or installation. When noting curves or irregularities, remember to measure the widest part of each curve at multiple points. Also, record both maximum and minimum dimensions accurately.
Make sure to take separate measurements for concave and convex areas. It’s a good idea to photograph the bathtub’s unique shapes from different angles for reference. This detailed approach ensures you capture all nuances for a precise fit.
Verify Measurements at Multiple Points
Although you may have taken initial measurements, you need to verify them at multiple points to guarantee accuracy. Measure the bathtub’s length along the longest side at the front, middle, and back to catch any shape irregularities.
For the width, check the widest point, including the rim or flange, in several spots. Don’t forget to measure the height from the floor to the tub’s top edge at different locations to spot any slopes or inconsistencies.
Also, record the distance from the drain center to the side and end walls at various heights to ensure your plumbing fits. Finally, use a level to confirm the tub’s surface is even across these points, so your measurements truly reflect the tub’s dimensions.
Double-Check All Data for Accuracy
Because even small errors can cause big problems, you should double-check all your bathtub measurements carefully.
Small measurement mistakes can lead to major issues, so always double-check your bathtub dimensions carefully.
Before buying or installing, confirm your measurements twice to avoid costly mistakes. Cross-check your dimensions against the manufacturer’s specs to ensure they match perfectly.
Use a reliable, calibrated tape measure that isn’t stretched or damaged to get precise readings. Record measurements at various points—floor, rim, and wall—to catch any irregularities and guarantee a snug fit.
To stay organized and clear during installation, document everything thoroughly with notes and photos.
- Confirm measurements twice for accuracy
- Cross-check with manufacturer’s specifications
- Use a properly calibrated tape measure
- Document measurements with notes and photos
Double-checking saves you time, money, and frustration.
Frequently Asked Questions
What Is the Standard Size of a Bathtub in Feet?
The standard size of a bathtub is usually about 5 feet long and between 2.5 to 3 feet wide. Depth typically ranges from 14 to 16 inches, but length and width are what you’ll mainly focus on.
When you’re picking a tub, these dimensions are a good baseline to keep in mind. Of course, there are variations, but this size fits most bathrooms comfortably.
Can I Put a New Tub Over My Old One?
Yes, you can put a new tub over your old one if the existing tub and floor can support the weight. Measure carefully, check plumbing alignment, and make certain the old tub’s condition is solid before proceeding.
Just make sure everything lines up right and is sturdy enough to handle the new installation. It’s a good idea to double-check all measurements and plumbing connections first. That way, you avoid any surprises down the road.
How Long Should a Bath Be?
Your bath should be around 60 inches long for standard comfort, but you can select longer if you want more room to stretch.
Always consider your height and bathroom space to guarantee a perfect fit. It’s all about making sure you’re comfy and everything fits just right.
What’s the Average Cost of a New Bathtub?
Buying a new bathtub is like choosing a cozy nest—expect to spend between $300 and $3,000 depending on style and material.
Remember, installation and plumbing can add $500 to $2,000, so budget wisely.
It’s a good idea to plan ahead so you’re not caught off guard by extra costs.
That way, you’ll get the perfect tub without any surprises!
Conclusion
Measuring your bathtub carefully is like tuning a musical instrument—precision makes all the difference. By following these steps and double-checking your numbers, you’ll get accurate measurements that save time and hassle later.
Remember, taking your time now guarantees everything fits perfectly when you’re ready to install or replace your tub. So grab your tools, stay patient, and measure with confidence—you’ve got this down to a science!
Accurate bathtub measurements are crucial for a smooth installation or replacement process. With the right approach, you avoid costly mistakes and ensure your new tub fits perfectly in your bathroom space. Stay focused, use the right tools, and don’t rush. Measuring a bathtub might seem tricky at first, but with these simple steps, you’ll master it quickly and easily. Just keep practicing, and soon measuring your bathtub will feel second nature.